For this tutorial I'm using Inkscape 0.46
This tutorial describes how to create an analog alarm clock in Inkscape.
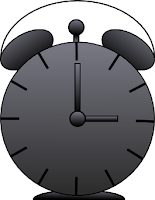
This is the final result:
1. Select the circle tool from the left panel, hereby called the toolbox.
2. Draw a perfect circle somewhere in the middle of your document, by holding down CTRL.
3.Right-click your new circle and choose Fill and Stroke, or press CTRL+SHIFT+F.
4. In the Fill and Stroke dialog, click on the Fill tab. Make the fill a white flat colored one by clicking on the little blue box at the top of the dialog. The RGBA value should be ffffffff.
5. Now click on the Stroke paint tab. Do the same here, make the stroke a solid black flat colored one (RGBA value: 000000ff).
6. Now you should have a white circle with a black border in your document.
Let's create an ellipse, this is going to be one of the two bells, so it shoud be significant smaller then the first circle you made.
7. If your not happy with the size of it, drag the appropriate arrows surrounding it. Then click on it, the arrows around will change. Now when you use an arrow it will rotate the bell, rotate it about 45 degrees and place it on your big circle. In the main menu, go Object->Lower (or press PgDown on your keyboard) until your bell is behind the big circle.
It should look something like this: 8. Copy your bell and paste it. Select the left bell, in the top of the main window copy the Y-coordinate (the verical coordinate). The click on the second bell and paste the Y-coordinate. In the main menu click on Object->Flip Horizontal.
9. Select both the left bell and the big circle, by holding shift down and select first the bell, then the big circle. Then go Object->Align and Distribute, or press CTRL+SHIFT+A. Make sure the Realtive to drop-down option is set to Selection, then press the Align to left sides icon. It's located in the upper-left part of the Align box.
10. Repeat step 11, but this time with the right bell selected. Align the right sides this time.
11. Now grab the text tool and click somewhere in your document. Draw 12 I's with 4 spaces between them (press I, then tap space bar 4 times, then write an I again etc). My font preferences are Bitstream Vera Sans, size 40.
12. Select the big circle, then go Path->Object to Path. Select the Edit Path tool in your toolbox and select the top node of the big circle. Then click on Break path selected nodes from the Edit path toolbar. Then click Path->Reverse.
Select the text and the circle, go Text->Put on Path.
13. Now select the big circle and the two bells. In the top of the window, besides the object coordinate you can change the width and/or height of the selection. Click on the lock to make sure that you'll maitain the ratio between width and height. My height was originally 329.812, I changed this to 263.812. This is to make the text numbers look better inside the clock. After that, you may want to rotate the numbers a bit to make them look more straight.
14. Now create a rectangle, it should be rather thin and the length should cover from the bottom of the number 12 in the clock, down to the middle of the circle. Copy that and make it half as long, then rotate it a bit.
15. Create a circle in the middle of the big circle, just to cover up the clock's hands. Copy the big clock hand and the little circle, move the new little circle on top of the new hand and put them in the middle of the bells. Click Object->Lower to hide unnessecery parts.
16. Create a new ellipse, this is going to be a handle bar. In the circle toolbar, set 180 in the Change Start field.
17. Create a new ellipse, at the bottom of the clock. It should be a half-circle as of what you did in the last step, that's perfect, exactly what we want.
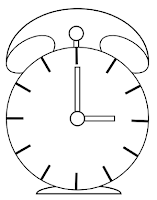
18. Time to do some coloring! But before we start, does your clock look something like this?
19. Great, let's move on! Right click the left bell and choose Fill and Stroke. In the Fill tab choose Linear gradient and then click the edit button.
Select the stop first in the list and set the RGBA value to: 000000ff.
Then select the second stop and set its RGBA value to: 7a7a86ff.
Now the gradient is applied, but it's not looking that good. Choose the Edit Path tool in the toolbox and drag the gradient lines until you are happy. It should look something like this: 20. Now select the right bell and do the same, repeat this until almost every part of your clock is colored.
You can change the gradient tone if you want to. For example, for the big circle I chosed a dark grey color instead of plain black. Of course you may play around with real colors as well.
21. Now you are done!
This is my final result:
Sunday, January 18, 2009
Inkscape: Create an analog alarm clock
Subscribe to:
Post Comments (Atom)
awesome, would be nice if you posted the svg file as well, because I don't think mine can look as good as yours (i am a programmer not an artist!). Thanks for the great tutorial though.
ReplyDeleteays on whatever topic the client requires? be it on marketing itself or on other related subjects such as business or advertising.
ReplyDeleteBuy K2 herbal Incense
sources back to your site? My blog is in the very same area of interest as yours and
ReplyDeletemy users wou
whatever topic the client requires? be it on marketing itself o
ReplyDeleteon whatever topic the client requires? be it on marketing itself or on other related subjects such as business or
ReplyDeletene or more joints, which results in reasonably smooth shots even when you, yourself, aren't so smooth. Human genes have changed over just the last few years we have added
ReplyDeletere joints, which results in reasonably smooth shots even when
ReplyDeleteI’m really enjoying the design and layout of your blog.
ReplyDeleteI really appreciate your work and very amazing and important information about the Women's Watches which have share in this blog.
ReplyDeleteWomen's Watches